DIY Developer Guide: Building Custom Integrations for UPS
A step-by-step guide to building custom integrations with UPS APIs for shipping, tracking, and logistics management.
Overview
UPS provides comprehensive APIs for shipping rate calculation, label generation, tracking, and logistics management. This guide covers building custom integrations for enterprise shipping operations.
Prerequisites
- UPS Developer Account and API credentials
- Familiarity with RESTful APIs, OAuth 2.0, and JSON data structures
- Tools: Postman, UPS Developer Kit Documentation
Step 1: Authentication
UPS uses OAuth 2.0 for API authentication. Obtain client credentials and exchange for access tokens.
Step 2: Endpoint Discovery and Data Mapping
Common API Resources: Rating, Shipping, Tracking, Address Validation, Time in Transit, Pickup.
Map package dimensions, service levels, and account numbers to UPS specifications.
Step 3: Building Integration Flows
- Inbound (to UPS): Create shipments, generate labels, schedule pickups
- Outbound (from UPS): Retrieve tracking data, delivery notifications, rate quotes
Step 4: Error Handling and Rate Limiting
Handle address validation errors and service availability issues. Implement retry logic for transient failures.
Step 5: Security Best Practices
- Store OAuth credentials in secure vaults
- Enforce TLS for all API traffic
- Implement webhook verification for tracking updates
- Rotate credentials periodically
Step 6: Testing and Validation
- Use UPS sandbox environment
- Validate rate calculations across service levels
- Test label generation and void operations
Step 7: Deployment and Monitoring
- Monitor API response times and error rates
- Alert on shipment creation failures
- Track carrier performance metrics
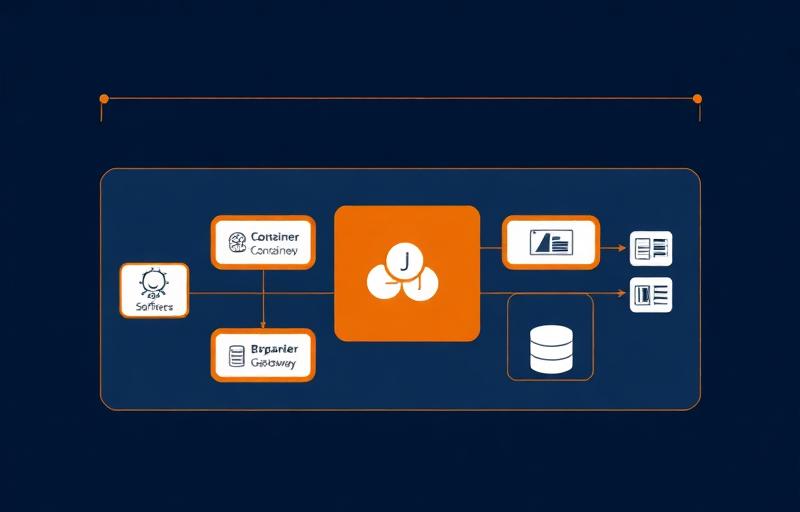
When to Use a Managed Platform
For multi-carrier shipping operations requiring intelligent routing and cost optimization, a managed integration platform like APIWORX provides unified carrier management at scale.
See the APIWORX platform in action
Tell us about your systems and we'll build a tailored automation plan within 24 hours.
Talk to an expert